


The fastest way to improve mouthpiece projection is to center each note on the instrument’s resonant frequency while using a mouthpiece setup that emphasizes higher harmonics. When those two things align, your sound carries across a hall with noticeably less physical effort.
Here are six things you can try in the next five minutes:
- Angle the bell slightly upward or outward toward the audience rather than pointing it at the floor. Even a 10–15 degree shift changes how directly sound reaches the room.
- Center the note by listening for the “slot.” Play a long tone and nudge pitch slightly sharp, then flat. The spot where the note feels most stable and resonant is the center. That is where projection lives.
- Run a placement ladder. Pull the mouthpiece out 1 mm, play a long tone, push it in 1 mm, play again. Listen for the position where the tone feels fullest with the least jaw pressure.
- Swap your reed before your mouthpiece. A worn or mismatched reed kills projection faster than almost any other variable. Try a fresh reed at the same strength first.
- Drop your jaw slightly and widen your oral cavity. Think of the vowel shape “AH” rather than “EE.” This opens the vocal tract and lets more harmonic energy through.
- Support from the lower ribs, not the throat. Place a hand on your lower ribcage and feel it expand outward on the inhale. That expansion is the foundation of a supported, projecting tone.
What to listen for: Two clear signs that a change worked. First, the note feels easier to sustain at the same dynamic. Second, a listener standing 10–15 feet away reports the sound is clearer and more present, not just louder.
Pro Tip: Record yourself on a phone placed 12–15 feet away before and after each change. Your ears adjust quickly in the practice room, but the recording does not lie.
Key Takeaways
Projection improves fastest when you center each note on the instrument’s resonance, support the airstream from the lower ribs, and match mouthpiece geometry to your technique level.
| Point | Details |
|---|---|
| Center the note first | Find the resonance slot on each pitch before changing any equipment. |
| Breath support drives carry | Lower rib expansion and a raised soft palate sustain harmonic richness through the full note. |
| Geometry changes are ordered | Start with reed, then tip opening, then cup depth, then baffle, then chamber and backbore. |
| Evaluate with a recording | Place a recorder 10–15 feet away and compare before/after; clarity at distance confirms real projection gain. |
| Myclarinetstuff test box | Try Gleichweit mouthpieces at home with your own instrument using the matchmaker program for evidence-based selection. |
Table of Contents
- Why does projection actually work? Resonance and harmonics explained
- How embouchure and breath support actually increase projection
- Which mouthpiece features actually affect projection?
- Small placement and angle adjustments that sharpen focus
- Drills that build projection and help you find the sweet spot
- How to try and evaluate mouthpieces objectively
- Fast diagnostics: what is killing your projection right now?
- What most players get wrong about projection
- Precision manufacturing and the Myclarinetstuff test box program
- Sources
Why does projection actually work? Resonance and harmonics explained
Projection is not the same as volume. A sound that projects carries across a large room with clarity and presence, even at moderate dynamic levels. The mechanism behind it is resonance and harmonic content.
Every note you play excites a series of overtones above the fundamental pitch. When your setup, embouchure, and air support are aligned, those upper harmonics are strong and balanced. That spectral richness is what the human ear perceives as a “carrying” sound. A tone heavy in fundamental but weak in upper partials tends to sound thick and close, not projecting.
The mouthpiece sits at the heart of this process. Research on mouthpiece cup volume and spectral enrichment shows that internal geometry directly influences which harmonics are emphasized and how much blowing pressure is needed to produce a given radiated level. Smaller cup volumes tend to push energy into higher harmonics; larger volumes spread energy lower and wider.
Think of the signal chain this way: your vocal tract shapes the incoming air column, the mouthpiece cup and chamber amplify or dampen specific frequency bands, and the bore of the instrument radiates the result into the room. Each link in that chain either supports or undermines projection.
Key geometry factors and their acoustic roles:
- Cup volume: Controls spectral centroid. Smaller cup = brighter, more carrying sound.
- Baffle: A raised baffle reflects air upward into the reed, boosting upper harmonics and brightness.
- Chamber: Larger chambers warm the tone; smaller chambers concentrate upper partials.
- Backbore/throat: Influences compression and the instrument’s input impedance, affecting how easily resonances are excited.
Thomas R. Moore’s acoustics overview describes the cup as a compliance element and the throat as an inertance element. Together they create an acoustic resonator whose frequency shifts with geometry, changing both ease of play and register access. A shallower cup raises the resonance frequency, which is why players often reach for a different mouthpiece when they need cleaner high-register response.
Centering a note on the instrument’s resonant frequency produces larger vibrations at the same effort level. That is the physics behind the “slot” concept every good teacher talks about: you are not pushing harder, you are aligning with the instrument’s natural amplification.
How embouchure and breath support actually increase projection
Projection problems are almost always traced back to two sources: inconsistent air support and embouchure instability. The good news is that both respond quickly to targeted practice.
Building a supported airstream
Start with the breath. Efficient projection depends on a steady, pressurized column of air, not a burst of wind. The distinction matters because a burst creates a loud attack that decays fast, while a supported column sustains harmonic richness through the full length of the note.
Use these cues in order:
- Inhale through a wide-open throat, as if you are about to yawn. This prevents throat tension from choking the air column before it reaches the reed.
- Feel the lower ribs expand outward on the inhale. This is diaphragmatic engagement, and it is the physical anchor for a supported tone.
- On the exhale, maintain that rib expansion rather than letting the ribcage collapse immediately. Think of the air flowing out against a gentle resistance.
- Keep the soft palate raised (the “AH” vowel shape internally). A raised soft palate opens the oral cavity and allows the vocal tract to couple more efficiently with the mouthpiece resonances.
Acoustics research on vocal tract interaction confirms that the vocal tract functions as an upstream duct whose resonances interact with the reed generator to shape timbre and register behavior. Adjusting the vowel shape you hold internally is not just a metaphor; it physically changes which resonances are excited.
Embouchure stability checklist
Biting is the single most common embouchure error that kills projection. When the jaw squeezes up, it damps reed vibration and chokes off the upper harmonics that make a sound carry. Practical clarinet guidance is clear on this: stable, firm embouchure corners with a relaxed jaw allow the reed to vibrate freely and produce a fuller harmonic spectrum.
Check these points before every practice session:
- Corners firm and forward, not pulled back in a smile shape.
- Lower lip cushioning the reed, not pressing into it. The lip acts as a flexible support, not a clamp.
- Jaw dropped slightly, creating space between the upper and lower teeth.
- Chin flat and pointing downward, not bunched upward.
To test whether you are biting: play a sustained concert G and gradually relax jaw pressure while keeping corner firmness. If the tone opens up and feels more resonant, you were biting. That fuller sound is closer to your projection potential.
Pro Tip: Try the “pencil trick” — hold a pencil horizontally between your lips for 30 seconds before playing to activate corner muscles without engaging jaw pressure. Advanced embouchure work for clarinetists is covered in detail at Myclarinetstuff’s embouchure tips guide.
Short exercises to build sustainable support
- Long tones at mezzo-forte, focusing on consistent air pressure from start to finish. Aim for 8–12 seconds per note without a dynamic sag in the middle.
- Crescendo/decrescendo on a single pitch. Start at piano, grow to forte, return to piano. The goal is to maintain tone core and center throughout the dynamic change.
- Vowel-shape long tones. Play the same note while internally shifting from “EE” to “AH” to “OH.” Listen for which vowel produces the most resonant, carrying tone. That is your target tract position.
Which mouthpiece features actually affect projection?
Mouthpiece geometry is not abstract acoustics. Each dimension has a predictable, audible effect on how your sound carries, and understanding the order of importance helps you make targeted changes rather than random swaps.
Baffle height and shape
The baffle is the ramp or shelf inside the mouthpiece just above the tip opening. A high baffle deflects the air stream more directly into the reed, which increases upper harmonic content and produces a brighter, more cutting tone. A low or scooped baffle allows the air to flow more smoothly, producing a warmer, rounder sound with less edge.
For projection in a large hall or ensemble context, a medium-to-high baffle tends to carry better because those upper harmonics cut through competing sound sources. The trade-off is a brighter timbre that may not suit every musical style.
Cup and chamber size
Cup volume is one of the most reliable levers for changing spectral content. Experimental measurements confirm that cup volume correlates with radiated spectral centroid and an effort ratio, meaning a smaller cup volume tends to produce stronger higher harmonics at equivalent blowing effort. A larger cup warms the tone and spreads energy across a broader frequency range, which can reduce perceived carry in a reverberant room.
Chamber size interacts with cup volume. A smaller, more cylindrical chamber concentrates upper partials; a larger, more conical chamber diffuses them. For clarinet-specific projection, the combination of cup depth and chamber shape is often more influential than any single dimension alone.
Facing curve and tip opening
Tip opening is the gap between the reed tip and the mouthpiece tip rail, measured in millimeters or hundredths of an inch. A larger tip opening increases the potential dynamic range and volume ceiling, but it demands stronger air support and a firmer embouchure to control. A smaller opening offers more resistance, which can actually help players who struggle with consistency, but it limits the upper dynamic range.
Practical mouthpiece guides explain that tip opening interacts directly with reed strength: a wider opening typically pairs with a softer reed to maintain playability, while a narrower opening pairs with a harder reed. Changing tip opening without adjusting reed strength is one of the most common errors players make when trying to improve projection. More on tip openings and their effect on playing is available at Myclarinetstuff’s tip opening guide.
Backbore and throat
The backbore is the tapered section behind the chamber that connects the mouthpiece to the instrument bore. Its shape influences compression inside the mouthpiece and affects how tightly the note “slots” on a resonance. A tighter backbore increases resistance and compression, which can improve focus and center. A more open backbore reduces resistance and can make the tone feel freer but less focused.
Pro Tip: When evaluating mouthpiece geometry, change one variable at a time. Swapping baffle height and tip opening simultaneously makes it impossible to know which change produced the result you heard.
Ordered list of mouthpiece changes to try, from least to most disruptive:
- Reed strength/brand (same mouthpiece, different reed): immediate effect on response and projection, zero adaptation time.
- Tip opening (same model, different facing): noticeable change in dynamic ceiling and resistance within one session.
- Cup depth (same brand, shallower or deeper): affects register balance and spectral content; allow 1–2 weeks to adapt.
- Baffle height (different mouthpiece model): significant tonal shift; allow 2–4 weeks for reliable assessment.
- Chamber and backbore (different mouthpiece design): the most fundamental change; allow 4+ weeks before judging.
Small placement and angle adjustments that sharpen focus
Physical placement of the mouthpiece on the reed and in the mouth is one of the most underused projection tools. Small, measurable changes here produce immediate, audible results.
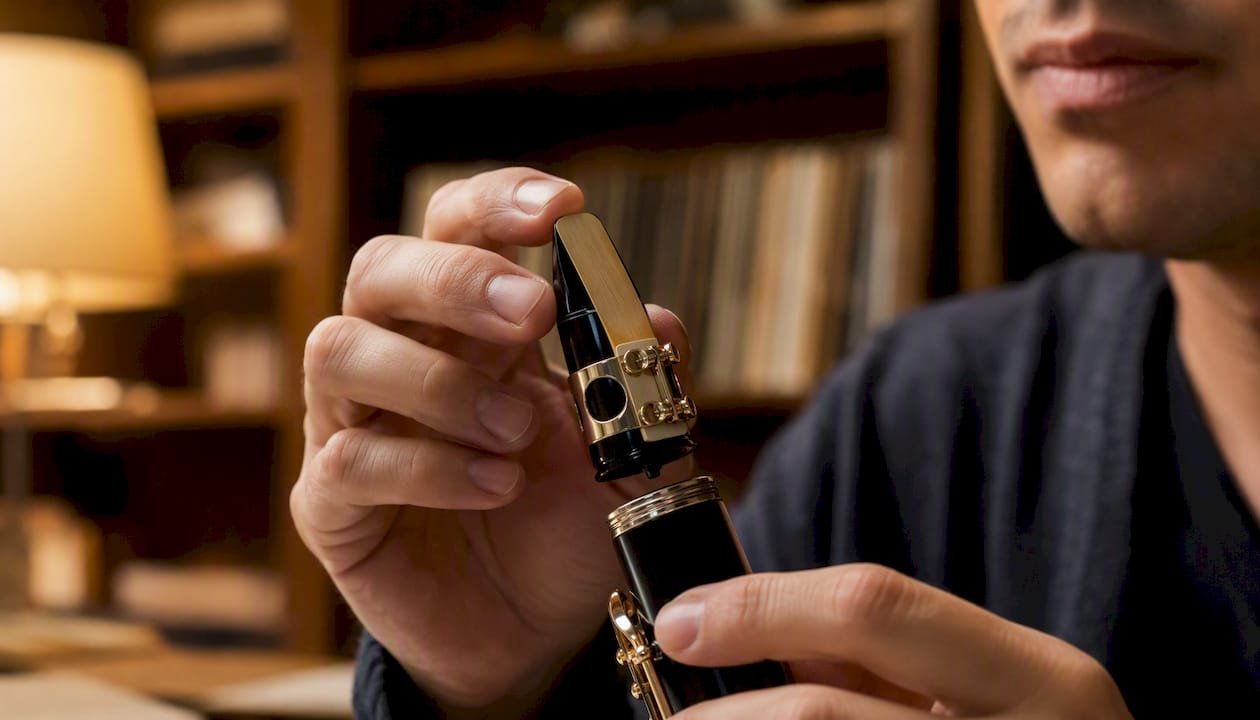
Mouthpiece depth in the mouth
Clarinet placement guidance recommends a starting point of approximately 8–12 mm of reed inside the mouth, measured from the tip of the reed to the lip contact point. From that baseline, use a placement ladder:
- Mark your current placement lightly with a soft pencil on the mouthpiece shank.
- Play a sustained concert G at mezzo-forte and note the tone quality.
- Take in 1 mm more mouthpiece and repeat.
- Pull back 1 mm from your original position and repeat.
- Compare the three positions. The position with the most resonant, centered tone and the least jaw tension is your target.
Too little mouthpiece in the mouth tends to produce a thin, unfocused tone with poor low-register response. Too much creates a muffled, sharp-tending pitch with excess reed contact. The sweet spot is where the reed vibrates most freely across its full length.
Facing depth and rotation
Rotation refers to the angle at which the mouthpiece sits relative to the upper teeth. Tilting the mouthpiece slightly upward (increasing the angle of the instrument toward the floor) tends to increase reed contact and resistance. Tilting it slightly downward (lowering the bell) reduces contact and opens the tone. Most players find a slightly downward bell angle produces better projection in a hall because it directs sound outward rather than into the floor.
Pro Tip: Use the mouthpiece-only pitch test to confirm placement. On a Bb clarinet mouthpiece alone, a centered concert G (concert pitch) indicates correct placement and embouchure. Consistently sharp suggests too little mouthpiece; flat suggests too much.
Bell direction in performance
- Point the bell toward the audience, not the music stand or the floor.
- In ensemble settings, raise the bell slightly when you need to project over other instruments.
- In a pit or low-ceiling space, angle the bell toward a reflective surface (a music stand, a wall) to redirect sound outward.
These are not subtle adjustments. A bell pointed at the floor loses significant high-frequency energy to absorption before the sound reaches any listener.
Drills that build projection and help you find the sweet spot
Consistent projection is a trained skill, not a natural gift. These drills are sequenced from foundational to advanced, and each one has a measurable outcome you can track.
Core drill sequence
- Mouthpiece-only pitch work (5 minutes daily). Play sustained tones on the mouthpiece alone, targeting a stable, centered pitch. On a Bb clarinet mouthpiece, aim for concert G. Consistent pitch indicates consistent embouchure and air support. Variation of more than a quarter tone signals instability.
- Focused long tones (10 minutes). Play each note of a chromatic scale from low E to high C, holding each for 8 seconds at mezzo-forte. Focus on sustaining the same tone core from attack to release. Record this exercise and listen back.
- Center-the-note gliss drill. On a single pitch, slowly bend the note a quarter tone sharp, return to center, bend a quarter tone flat, return. The goal is to feel and hear the resonance “lock in” at center. This trains the ear and embouchure to find the slot reliably.
- Dynamics ladder. Play a single pitch from pianissimo to fortissimo in four equal steps, then back down. The tone core should remain consistent across all dynamic levels. If the tone thins or spreads at forte, air support is breaking down.
- Vowel-shape vocal tract exercises. Alternate between “EE,” “AH,” and “OH” vowel shapes on a sustained pitch. Listen for which shape produces the most resonant, carrying tone, then practice holding that shape consistently.
Recording test protocol
Recording at distance is one of the most reliable diagnostics for confirming whether changes improve projection in a real room. Here is a practical setup:
- Place a phone or recorder 10–15 feet away at ear height.
- Play a standardized excerpt (a slow scale, a lyrical phrase, a technical passage) before and after any change.
- Listen for: clarity of tone at distance, sustain of upper harmonics through the phrase, and whether the sound feels present or recessed.
Use a free SPL meter app (such as NIOSH SLM or Decibel X) to get a rough level reading. A change that increases perceived clarity without a significant SPL increase is a genuine projection improvement, not just a volume change.
Weekly micro-plan
| Day | Focus | Duration |
|---|---|---|
| Monday | Mouthpiece-only pitch work + long tones | 15 min |
| Wednesday | Center-the-note gliss + dynamics ladder | 15 min |
| Friday | Full recording test + vowel-shape exercises | 20 min |
Stick to this for three weeks before evaluating results. Projection improvements from technique work typically become consistent after 2–4 weeks of daily practice.
How to try and evaluate mouthpieces objectively
A mouthpiece tryout without a protocol is just an opinion. These steps make your evaluation repeatable and evidence-based, whether you are a student trying two options or an educator comparing a dozen.
Standardized tryout protocol
- Warm up for 10–15 minutes on your current mouthpiece before trying anything new. Cold embouchure produces unreliable results.
- Use the same reed and ligature for every mouthpiece in the trial. Reed variation is the largest uncontrolled variable in most informal tryouts.
- Play a standardized test sequence: a slow chromatic scale, a lyrical excerpt from your current repertoire, and a technical passage. Use the same sequence for every mouthpiece.
- Record each mouthpiece at 10–15 feet using the protocol above.
- Note the effort ratio: how much air pressure does it take to produce a full, centered mezzo-forte tone? In-vivo trials with modified mouthpiece geometries showed measurable differences in mouth pressure across mouthpieces, confirming that effort ratio is a real, trackable metric, not just a subjective impression.
- Rest 5 minutes between mouthpieces to reset embouchure memory.
For a structured approach to choosing between options, Myclarinetstuff’s mouthpiece selection tips walk through the decision process in detail.
Adaptation timeline
A new mouthpiece often feels wrong for the first few days. This is normal. The embouchure and air support habits built on your previous mouthpiece need time to recalibrate. A realistic timeline:
- Days 1–3: Expect inconsistency. Intonation and tone center will feel unstable.
- Days 4–7: The embouchure begins to adapt. Tone center improves noticeably.
- Weeks 2–4: You can now make a reliable judgment about whether the mouthpiece suits your playing.
Do not dismiss a mouthpiece after one session, and do not keep one for six weeks hoping it will improve. Two to four weeks is the honest window for a fair assessment.
Evaluation checklist
- Effort ratio: Does it feel easier or harder to produce a full tone at mezzo-forte?
- Center/slotting: Do notes lock in cleanly, or do they feel vague and hard to tune?
- Dynamic range: Can you play a genuine pianissimo without the tone collapsing?
- Tone core at distance: Does the recording at 10–15 feet sound present and clear?
- Intonation across registers: Are the throat tones and upper register in tune without extreme embouchure compensation?
Pro Tip: Run a blinded listening test when possible. Record both mouthpieces with a colleague playing, then listen back without knowing which is which. The one that sounds more present and clear on the recording is the better projector, regardless of how it felt to play.
Fast diagnostics: what is killing your projection right now?
Most projection problems have a simple, immediate cause. Work through this list before changing equipment.
Common causes and immediate fixes:
- Bell pointing at the floor or music stand. Fix: raise the bell 10–15 degrees toward the audience. Test immediately.
- Biting the mouthpiece. Fix: drop the jaw slightly and play the same note. If the tone opens up, biting was the problem.
- Weak or unsupported breath. Fix: place a hand on your lower ribcage and play a long tone. If the ribs collapse within two seconds, breath support is failing.
- Wrong tip opening for your reed. Fix: try a reed one half-strength softer. If projection improves immediately, the tip opening is too wide for your current reed.
- Worn or waterlogged reed. Fix: swap to a fresh reed of the same strength. A reed that has been played for more than 6–8 hours of cumulative use often loses its projection edge.
- Mouthpiece placed too shallow. Fix: take in 1–2 mm more mouthpiece and test with a long tone. Listen for a fuller, more centered tone.
- Pad leaks or key mechanism issues. Fix: hold each key down and listen for air escaping around the pad. Any hiss indicates a leak that is robbing resonance. This requires a technician.
- Barrel/mouthpiece fit mismatch. Fix: check that the barrel seats flush against the mouthpiece tenon with no gap. A loose fit creates an air leak that diffuses the tone.
- Throat tension. Fix: yawn before playing to reset the soft palate and throat opening. Then play immediately.
- Mouthpiece facing worn or chipped. Fix: inspect the tip rail and side rails under good light. Any chip or uneven wear requires a mouthpiece replacement or professional refacing.
When to call a technician vs. adjust your technique: Pad leaks, key mechanism problems, and worn facings are equipment issues that no amount of technique work will fix. Everything else on this list is a player-side adjustment you can address in the next practice session.
What most players get wrong about projection
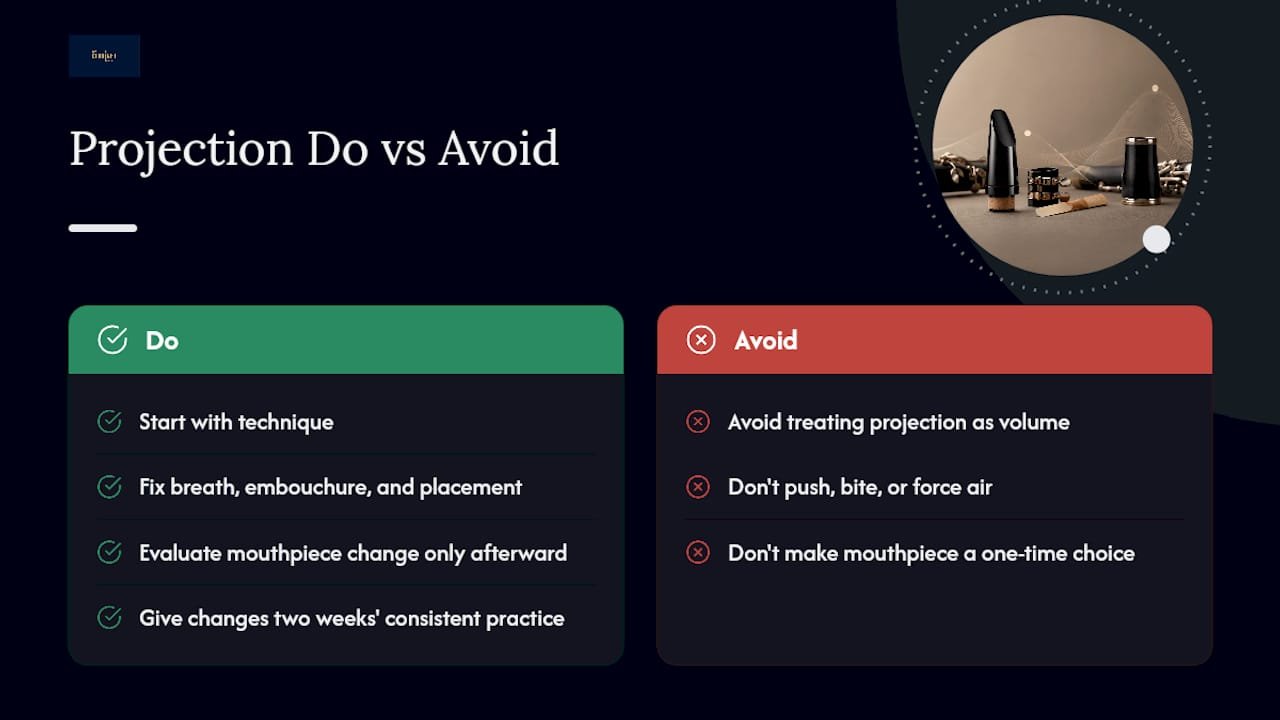
Projection is consistently misunderstood as a volume problem. Players push harder, bite more, and force the air, and the result is a louder but less carrying sound, because all three of those responses damp the upper harmonics that actually make a tone travel.
The research is clear on this point: efficient projection depends on harmonic balance and centering the note, not on brute force. The players who project best in a large hall are often not the loudest players in the section. They are the ones whose tone has a focused core and a rich upper partial structure that the room amplifies naturally.
There is also a tendency among educators to treat mouthpiece selection as a one-time decision made at the beginning of a student’s development and then never revisited. That is a missed opportunity. As technique matures, the optimal mouthpiece geometry changes. A student who needed a forgiving, medium-resistance setup at age 14 may project significantly better at age 20 on a mouthpiece with a higher baffle and smaller chamber, because their air support and embouchure can now take advantage of that geometry.
The practical recommendation: start with technique. Fix the breath, the embouchure, and the placement first. Then, and only then, evaluate whether a mouthpiece change is warranted. A player with strong fundamentals will hear the difference between mouthpieces clearly. A player with weak fundamentals will not, because the mouthpiece cannot compensate for what the player is not providing.
Individual adaptation time varies. Give any technique change at least two weeks of consistent daily practice before judging whether it worked. Give any mouthpiece change the same window.
Precision manufacturing and the Myclarinetstuff test box program
When technique is solid and you are ready to evaluate mouthpiece geometry honestly, manufacturing consistency becomes the variable that matters most. A mouthpiece with dimensional variation between units makes it impossible to know whether a projection difference is real or just unit-to-unit variation in the same model.
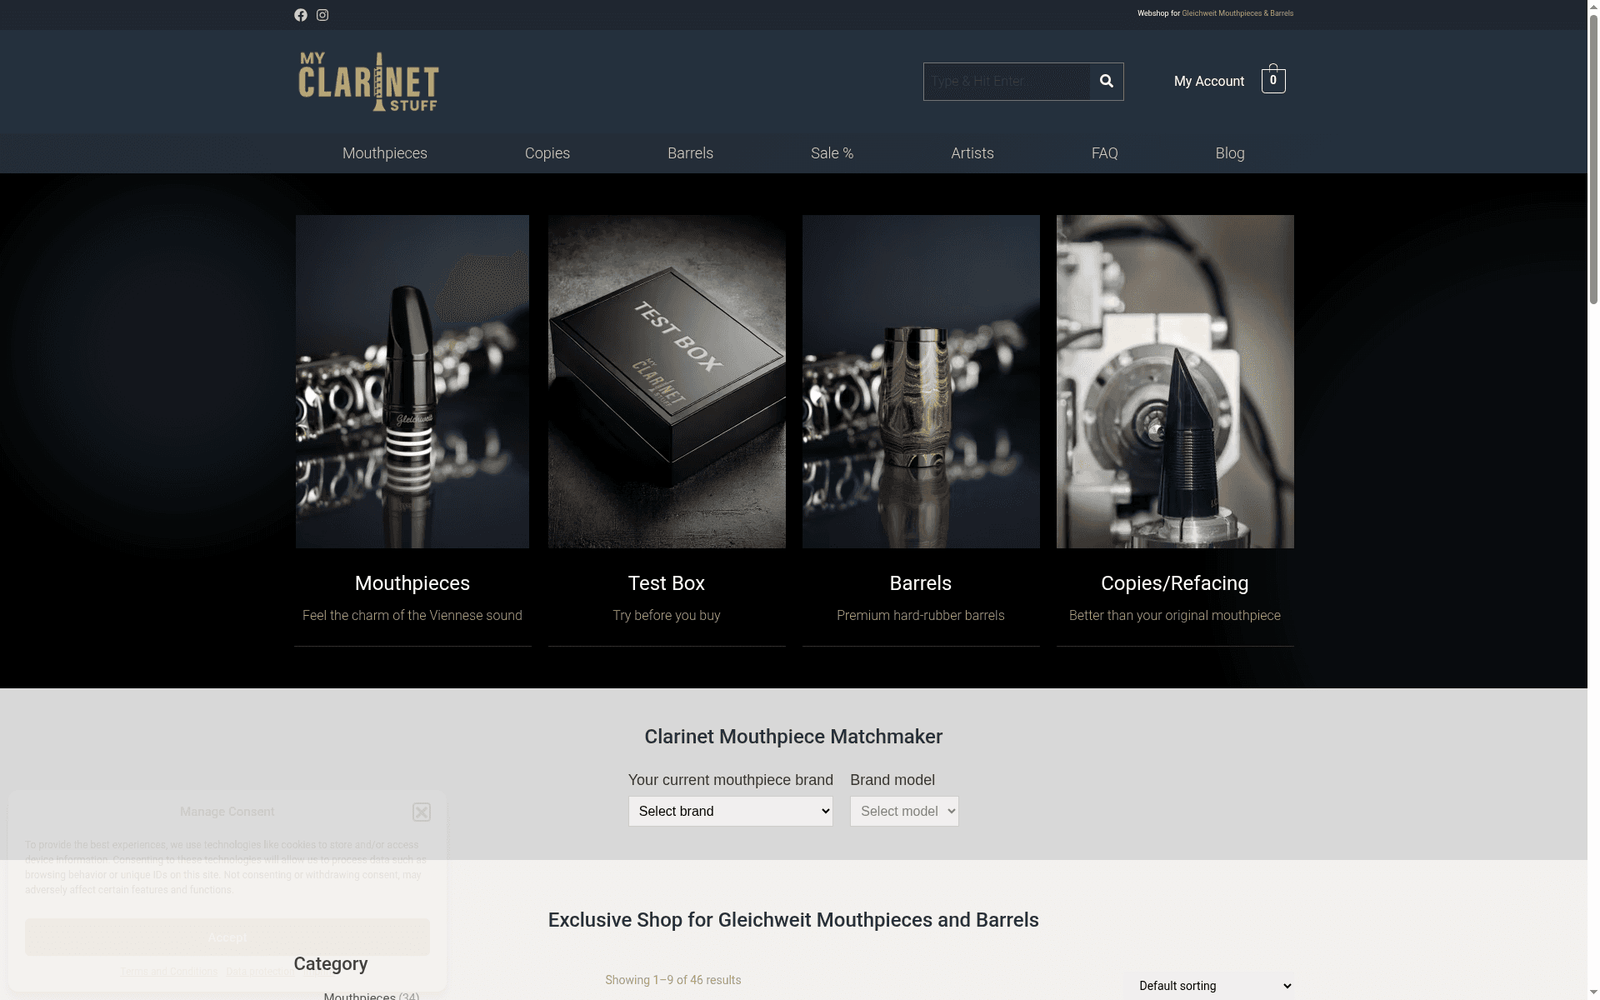
Gleichweit mouthpieces, distributed in the U.S. by Myclarinetstuff, are CNC-machined from synthetic material to tight tolerances, which means the cup volume, baffle geometry, and facing dimensions are consistent from one piece to the next. That consistency is what makes a fair tryout possible: when you compare two Gleichweit models, you are comparing geometry, not manufacturing variation.
Myclarinetstuff’s at-home test box program lets you try multiple mouthpieces in your own practice space, with your own instrument and reeds, using the tryout protocol described above. That is the most reliable way to evaluate projection differences, because the room, the instrument, and the player are all controlled. Start your tryout by visiting the Clarinet Mouthpiece Matchmaker to find the options best matched to your instrument and playing goals.
Sources
- Mouthpiece influence on spectral enrichment and effort ratio (conference paper)
- Measurements on mouthpiece geometry and effort ratio (ViennaTalk 2015)
- The Acoustics of Brass Musical Instruments (Thomas R. Moore)
- Mastering clarinet mouthpiece placement for optimal sound