You practice diligently, but your clarinet produces an airy, weak, or squeaky tone. Sound quality problems frustrate clarinetists at every level, yet most issues stem from a few common causes. This guide walks you through a systematic troubleshooting method to identify and fix clarinet sound problems efficiently, helping you achieve consistent, clear tone quality.
Table of Contents
- Prerequisites: Tools And Knowledge Needed Before Troubleshooting
- Step 1: Reed Inspection And Maintenance
- Step 2: Mouthpiece And Ligature Adjustments
- Step 3: Clarinet Assembly And Leak Testing
- Step 4: Embouchure And Air Support Techniques
- Common Mistakes And How To Fix Them
- Expected Outcomes And Success Metrics
- Maintenance Tips To Prevent Sound Problems
- Enhance Your Clarinet Sound With Expert Equipment Selection
- FAQ
Key Takeaways
| Point | Details |
|---|---|
| Reed problems cause most sound issues | A chipped or misaligned reed is responsible for nearly 90% of sound failures and weak tone. |
| Systematic checks save time | Start with reed, then mouthpiece, assembly, and technique to pinpoint problems quickly. |
| Proper maintenance prevents recurring issues | Regular cleaning, drying, and professional checkups extend instrument life and maintain sound quality. |
| Focused air and relaxed embouchure improve stability | Steady breath support and correct lip position reduce squeaks and tonal inconsistency. |
Prerequisites: Tools and Knowledge Needed Before Troubleshooting
Before diving into troubleshooting, gather essential tools and create an optimal testing environment. You’ll need a cleaning swab, mouthpiece brush, cork grease, leak light or small flashlight, and an electronic tuner. These items help you inspect, clean, and test your clarinet accurately.
Work in a quiet room where you can hear subtle sound nuances without distraction. Background noise masks problems like air leaks or fuzzy tone, making diagnosis harder. A silent space lets you focus on each adjustment’s impact.
Understand your clarinet’s basic anatomy and correct assembly order. Knowing where joints connect, how pads seal tone holes, and proper reed placement speeds up troubleshooting. Familiarity with your instrument’s normal feel and sound helps you recognize when something is off.
Prepare yourself physically for testing. You need steady breath control to produce consistent sound during each check. Take a few deep breaths and relax your shoulders before starting. Tension in your body translates to tension in your embouchure, which affects tone quality.
Keep these tools handy:
- Cleaning swab for bore and joint moisture removal
- Mouthpiece brush for debris and residue cleaning
- Cork grease for smooth, airtight joint assembly
- Leak light or flashlight for visual pad and joint inspection
- Electronic tuner to monitor pitch stability during adjustments
Step 1: Reed Inspection and Maintenance
Start troubleshooting with the reed, the single most common cause of clarinet sound problems. A chipped, warped, or misaligned reed is the most common cause for failure to produce sound or weak clarinet tone, and replacing or repositioning the reed resolves this in nearly 90% of cases.
Examine your reed under good lighting. Look for chips along the tip or rails, cracks running through the vamp, or warping that prevents flat contact with the mouthpiece table. Even small imperfections disrupt vibration and cause squeaks, airy tone, or no sound at all.
Check reed placement on the mouthpiece. The reed tip should align precisely with the mouthpiece tip, with equal space visible on both sides. Misalignment causes one side to vibrate differently, producing fuzzy or squeaky sounds. Loosen the ligature, adjust the reed carefully, and retighten evenly.
Moisture matters significantly. A dry reed won’t vibrate properly, producing weak or no sound. Soak your reed in clean water or use saliva for 30 to 60 seconds before playing. The reed should feel slightly soft and pliable, not brittle or stiff.
Replace damaged or worn reeds immediately. Old reeds lose responsiveness and produce inconsistent tone no matter how you adjust them. Stock multiple reeds of the same strength and rotate them daily to extend their lifespan and maintain consistent sound quality.
Follow these reed maintenance steps:
- Visually inspect for chips, cracks, and warping before each session
- Align reed tip exactly with mouthpiece tip, checking both sides
- Moisten thoroughly for 30 to 60 seconds before playing
- Replace reeds showing damage or persistent sound problems
- Rotate between three to four reeds to extend life and consistency
Pro tip: Keep a reed adjustment guide handy and follow a reed care workflow to maximize performance and lifespan.
Step 2: Mouthpiece and Ligature Adjustments
Once your reed is in good condition, focus on the mouthpiece and ligature. Misalignment of mouthpiece or improper ligature tension can cause unpredictable squeaks or fuzzy clarinet sound, often fixed by adjusting mouthpiece position and securing ligature correctly.
Clean your mouthpiece regularly using warm water and a mouthpiece brush. Moisture, saliva, and debris accumulate inside the chamber and on the table, affecting reed vibration and tone quality. A clean mouthpiece allows the reed to seal properly and vibrate freely.
Verify reed tip alignment with the mouthpiece tip. Look straight down at the assembled mouthpiece and reed. The tips should match exactly, with no overhang or gap. Even a millimeter of misalignment causes squeaks and tone instability.
Adjust ligature tension carefully. The ligature must secure the reed firmly without choking its vibration. Position the ligature so it covers the bark portion of the reed, not the cut vamp. Tighten evenly on both screws if your ligature has two, avoiding lopsided pressure.
Experiment with mouthpiece placement on the barrel. Pushing the mouthpiece further onto the barrel sharpens pitch and brightens tone, while pulling it out slightly flattens pitch and warms tone. Small adjustments of one to two millimeters can significantly impact sound quality and response.
Key mouthpiece and ligature adjustments:
- Clean mouthpiece interior and table with warm water and brush weekly
- Align reed tip precisely with mouthpiece tip for even vibration
- Position ligature over reed bark, not the vibrating vamp area
- Tighten ligature evenly to secure without choking reed
- Adjust mouthpiece depth on barrel by small increments for tone optimization
Pro tip: After basic adjustments, try different reed and ligature combinations using mouthpiece testing tips and follow an equipment selection process to find your best setup.
Step 3: Clarinet Assembly and Leak Testing
With reed and mouthpiece optimized, verify your clarinet’s airtightness. Performing visual inspection and pressure tests on clarinet joints and pads helps detect leaks and mechanical issues that degrade sound quality.
Assemble your clarinet carefully in the correct order: lower joint, upper joint, barrel, then mouthpiece. Align keys properly to avoid bending or misaligning mechanisms. Twist gently while pushing joints together, never forcing them.
Inspect pads visually. Look for tears, deterioration, uneven seating, or foreign objects stuck to pad surfaces. Worn pads don’t seal tone holes completely, allowing air to escape and causing weak, airy tone or register problems.
Use a leak light or small flashlight to check for light escaping around pads and joints. Work in a dim room, place the light inside each joint section, and cover tone holes one by one. Light leaking around a pad indicates a leak that needs professional attention.
Perform gentle pressure tests. Cover all tone holes and blow softly into the assembled clarinet. Listen and feel for abnormal air escaping at joints or around keys. Significant air loss indicates leaks requiring repair.
Apply cork grease to all joint corks before assembly. Greased corks slide smoothly and create airtight seals without excessive force. Dry corks stick, tear, and compromise joint seals, degrading sound quality.
| Leak Source | Symptoms | Fix |
|---|---|---|
| Worn pads | Weak tone, register problems, air leaks | Professional pad replacement |
| Dry joint corks | Difficult assembly, air escape at joints | Apply cork grease regularly |
| Bent keys | Keys don’t close fully, light visible | Professional adjustment |
| Foreign debris on pads | Sticky keys, incomplete seal | Clean pads gently with cigarette paper |
Assembly and leak checks:
- Assemble in order with gentle twisting, never forcing joints
- Inspect pads for tears, deterioration, and proper seating
- Use leak light in dim room to detect pad and joint leaks
- Blow gently and listen for abnormal air escape during pressure test
- Apply cork grease to all joints for smooth, airtight assembly
Consult clarinet setup essentials for more detailed assembly guidance.
Step 4: Embouchure and Air Support Techniques
After ensuring your instrument’s physical condition is optimal, evaluate your playing technique. Incorrect embouchure, including biting or shifting lips and jaw, frequently causes squeaks and unstable tone, while relaxing embouchure and steady air improve sound stability.
Maintain a firm yet relaxed embouchure. Your lower lip cushions the reed against your bottom teeth, while your top teeth rest lightly on the mouthpiece. Excessive biting chokes the reed and produces thin, squeaky tone. Too loose an embouchure allows air to leak, causing fuzzy or no sound.
Deliver focused, fast air with consistent volume. Think of blowing through a straw rather than sighing into the mouthpiece. Fast air creates strong reed vibration and produces clear, projecting tone. Slow, unfocused air yields weak, breathy sound.
Practice long tones daily to develop breath control and embouchure steadiness. Hold a single note for eight to sixteen beats at a comfortable dynamic, focusing on consistent tone quality from start to finish. Long tones reveal embouchure weaknesses and build strength.
Avoid shifting your jaw position or changing lip pressure mid phrase. Inconsistent embouchure causes pitch fluctuations, squeaks, and tonal instability. Lock your embouchure in a comfortable position and maintain it throughout your playing.
Around 70% of squeaks stem from reed or mouthpiece, but embouchure issues account for a significant portion of the rest.
Technique improvements for better sound:
- Keep embouchure firm but relaxed, avoiding excessive biting
- Blow focused, fast air consistently for clear reed vibration
- Practice long tones daily to build embouchure strength and control
- Maintain steady jaw and lip position without shifting
- Monitor tone stability with tuner and recording during practice
Pro tip: Use a tuner and microphone setup to monitor tone stability while adjusting embouchure, and explore performance tips for clarinet to refine your technique further.
Common Mistakes and How to Fix Them
Understanding frequent errors saves troubleshooting time and frustration. Most clarinet squeaks (~70%) stem from reed or mouthpiece issues, with leaks or mechanical causes accounting for ~20%, and purely technique related problems about 10%.
Incorrect or damaged reed placement ranks as the top mistake. Players often assemble quickly without checking reed condition or alignment. Always inspect your reed visually and align it precisely with the mouthpiece tip before tightening the ligature.
Misaligned mouthpiece causes fuzziness or squeaking that players mistakenly attribute to technique. Check that your reed and mouthpiece tips match exactly and that the ligature sits correctly over the reed bark.
Air leaks from worn pads or bent keys degrade tone quality gradually. Players adapt to declining sound without realizing their instrument needs repair. Schedule annual professional checkups to catch mechanical problems early.
Tense embouchure creates poor, unstable tone. Many players bite harder when experiencing problems, worsening the situation. Consciously relax your jaw and lips, focusing on air speed rather than lip pressure.
Neglecting drying after playing causes sticky pads and mechanism problems. Moisture accumulates quickly and damages pads over time. Always swab your bore thoroughly and wipe moisture from keys and pads after each session.
Avoid these common errors:
- Using damaged or misaligned reeds without inspection
- Assembling mouthpiece and ligature carelessly without alignment checks
- Ignoring air leaks and delaying professional maintenance
- Biting too hard or maintaining excessive embouchure tension
- Skipping post playing cleaning and drying routine
Expected Outcomes and Success Metrics
After working through this troubleshooting guide, you should see measurable improvements. Clear, focused tone with minimal squeaks or fuzziness indicates successful problem identification and correction. Your sound should feel effortless and respond consistently.
Consistent sound production across all registers confirms your instrument and technique are working properly. You should transition smoothly from low chalumeau to high altissimo without unexpected squeaks, cracks, or register breaks.
Quickly identifying and fixing recurring sound problems demonstrates mastery of the troubleshooting process. Over time, you’ll diagnose issues in seconds rather than struggling through practice sessions with poor tone.
Prolonged reed, pad, and instrument lifespan results from proper maintenance habits. Your reeds last longer, pads stay sealed, and mechanisms function smoothly when you follow preventive care routines.
Building player confidence and control during practice and performance represents the ultimate success metric. You trust your instrument and technique, focusing on musicality rather than worrying about squeaks or weak tone.
Measure your troubleshooting success:
- Achieve clear, focused tone with minimal squeaks across all registers
- Maintain consistent sound production from session to session
- Diagnose and fix problems quickly using systematic checks
- Extend equipment lifespan through regular maintenance
- Play with confidence, focusing on music rather than equipment concerns
Maintenance Tips to Prevent Sound Problems
Prevention beats troubleshooting every time. Consistent maintenance routines keep your clarinet producing optimal sound and prevent most common problems from developing.
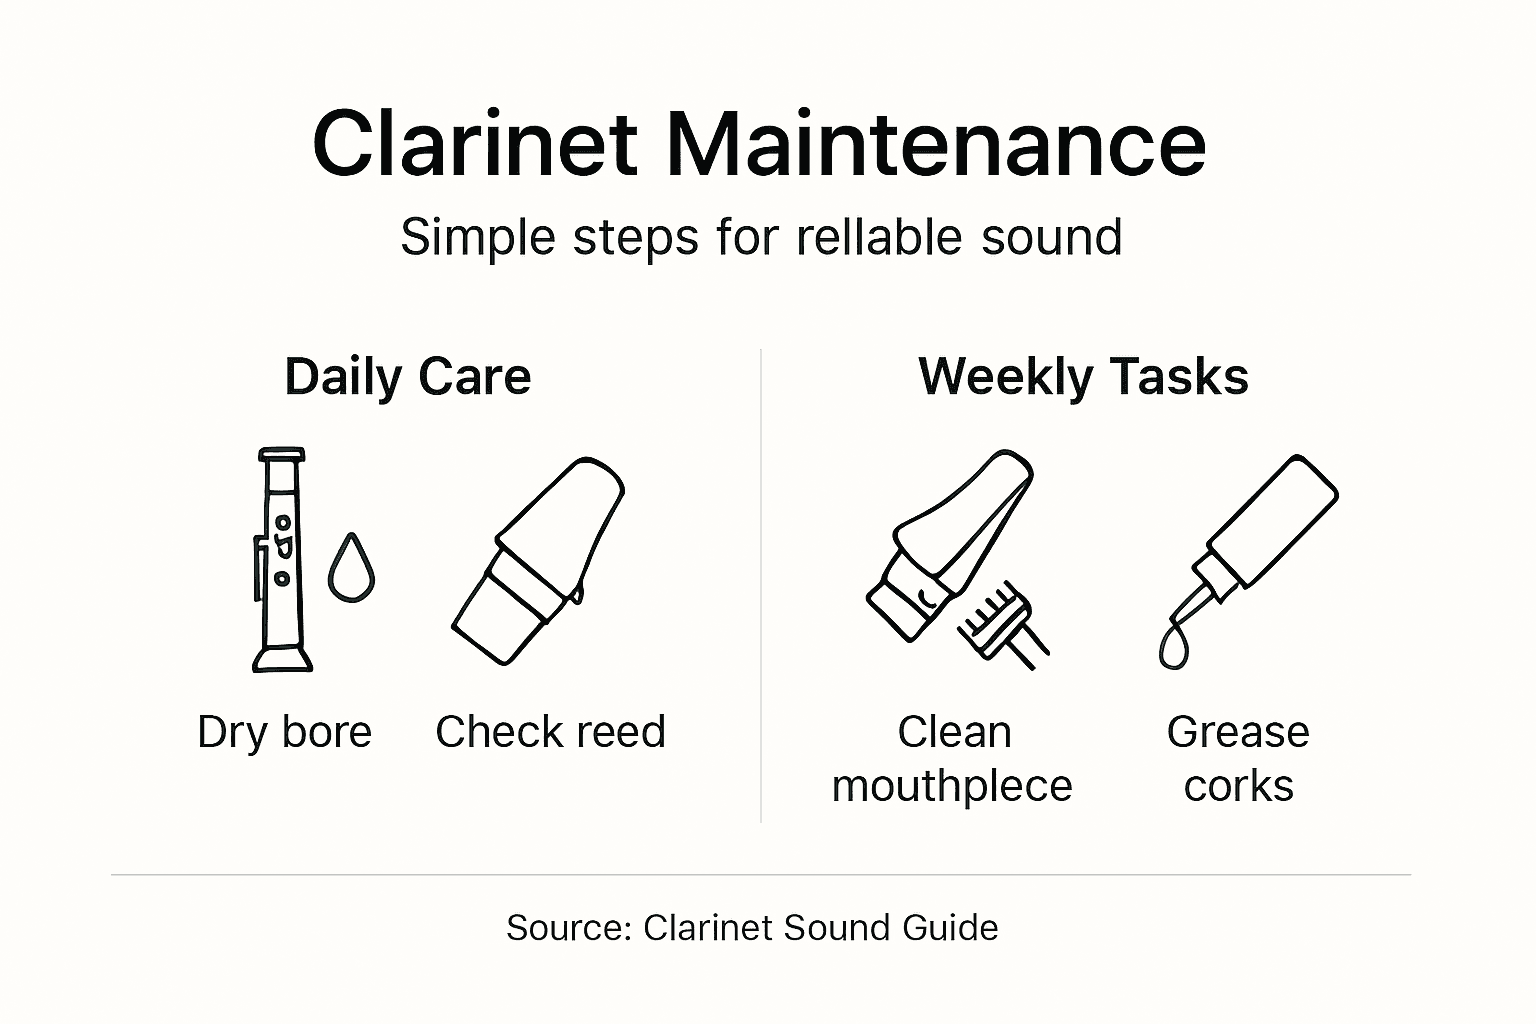
Dry the bore and mouthpiece thoroughly after every playing session. Inadequate drying of the clarinet bore and mouthpiece after playing leads to moisture buildup causing pad swelling and sticky keys, which degrade sound and cause squeaks if not addressed regularly. Pull a cleaning swab through the bore multiple times until it comes out dry.
Clean your mouthpiece and ligature weekly to prevent residue buildup. Use warm water, a mouthpiece brush, and mild soap if needed. Dried saliva and debris affect reed vibration and tone quality over time.
Apply cork grease to all joint corks before each assembly. This simple step ensures smooth assembly, proper sealing, and prevents cork damage. Reapply whenever joints feel tight or difficult to connect.
Schedule professional checkups for pad and key condition at least annually. Technicians catch developing problems early, saving you from major repairs and inconsistent sound quality. Regular maintenance extends your instrument’s life significantly.
Store your clarinet in a stable environment away from temperature and humidity extremes. Avoid leaving it in hot cars, near heaters, or in damp basements. Wood instruments especially suffer from environmental stress, leading to cracks and pad problems.
Preventive maintenance essentials:
- Swab bore and dry mouthpiece thoroughly after every session
- Clean mouthpiece and ligature with warm water and brush weekly
- Apply cork grease before assembly to ensure smooth, airtight seals
- Schedule annual professional maintenance for pads and mechanisms
- Store in stable environment, avoiding temperature and humidity extremes
Follow a clarinet maintenance checklist to establish consistent care habits.
Enhance Your Clarinet Sound with Expert Equipment Selection
Systematic troubleshooting solves most sound problems, yet equipment quality matters significantly. Exploring precision crafted mouthpieces and accessories can elevate your tone quality beyond what technique alone achieves. Our Clarinet Mouthpiece Matchmaker helps you find the perfect fit for your playing style and sound goals.

Discover mouthpiece selection tips tailored to your needs, whether you’re a student building fundamentals or a professional seeking consistent projection. Use our comprehensive clarinet equipment selection guide to make informed choices that support your musical growth and deliver superior tone, comfort, and reliability.
FAQ
What Causes Most Clarinet Squeaks?
Approximately 70% of squeaks come from reed or mouthpiece problems, not player technique alone. Leaks and mechanical issues cause about 20%, with technique responsible for roughly 10%. Start troubleshooting by inspecting your reed and mouthpiece alignment before assuming the problem is your embouchure.
How Do I Know When to Replace My Clarinet Reed?
Replace your reed if you notice chips, warping, cracks, or persistent sound issues after adjustment. Reeds that don’t respond well or sound weak even when properly moistened need replacement. Rotate between multiple reeds to extend their lifespan and maintain consistent performance.
What Is the Best Way to Check for Air Leaks on My Clarinet?
Use a leak light or small flashlight inside each joint in a dim room for visual leak detection. Light escaping around pads indicates poor sealing. Listen for abnormal air noise during gentle blowing, or perform pressure tests covering all tone holes to identify leaks requiring professional repair.
Can Adjusting Embouchure Fix Squeaks on the Clarinet?
Yes, relaxing a tense embouchure and maintaining steady, focused air helps reduce squeaks caused by technique. However, most squeaks originate from reed or mouthpiece issues and require addressing those first. Check equipment before making embouchure adjustments to avoid compensating for mechanical problems with poor technique.
Recommended
- 7-Step Clarinet Sound Improvement Checklist for Experts – My Clarinet Stuff
- Clarinet Upgrade Step by Step for Superior Sound Quality – My Clarinet Stuff
- Clarinet Performance Tips Guide for Achieving Your Best Sound – My Clarinet Stuff
- 7 Expert Clarinet Performance Tips for Better Sound Quality – My Clarinet Stuff