


The most reliable posture for bass clarinetists is to have the instrument come to you: sit tall at the front edge of the chair, use a floor peg plus a light neck strap, and set the mouthpiece angle close to your B♭ clarinet, roughly 45 degrees. Craning your neck down to meet the mouthpiece, or hunching your shoulders to hold the weight, causes most of the tension and tone problems bass clarinetists fight through a rehearsal.
Run these checks before you play a single note:
- Sit at the front third of the chair with your spine upright, not resting against the back.
- Plant both feet flat on the floor, shoulder width apart, for stable grounding.
- Adjust the floor peg until the mouthpiece reaches your embouchure without tilting your chin down or up.
- Let the neck strap take a little tension, not all the weight, so your shoulders stay loose.
The sections below explain why this setup works, how to fine-tune peg and strap height for your own body, and what to do when something still feels off.
Key Takeaways
Consistent chair height, a peg-and-strap combination, and a mouthpiece angle close to your B♭ clarinet resolve most bass clarinet posture and tension problems without buying new gear.
| Point | Details |
|---|---|
| Sit forward, spine tall | Front-edge chair posture engages the diaphragm and supports the bass clarinet’s higher air demand. |
| Use peg and strap together | The peg carries weight while the strap steadies the mouthpiece, creating stable three-point contact. |
| Match seat height to reach | An inch of seat height change affects pinky reach on the lower joint keys. |
| Rule out mechanics first | Squeaks and weak articulation often trace back to pad leaks or bridge misalignment, not posture. |
| Standardize your setup | Marking peg length and using the same chair for practice and performance builds reliable technique. |
Table of Contents
- Bass Clarinet Playing Posture: The Core Principles
- Setting Up the Floor Peg and Neck Strap Together
- Chair Height and Seating Adjustments That Stick
- Breath Support: Why Bass Clarinet Demands More Air
- Assembly and Maintenance Checks Before You Blame Your Posture
- Standing and Moving: Ergonomic Adjustments on the Fly
- Troubleshooting: Symptom, Likely Cause, Fix
- A Practical Setup Worth Copying
- What Actually Moves the Needle on Bass Clarinet Posture
- Sources
Bass Clarinet Playing Posture: The Core Principles
Good posture on bass clarinet is not about looking correct. It is about giving your diaphragm room to work and keeping your embouchure in a repeatable position, note after note, rehearsal after rehearsal.
Sitting forward at the edge of the chair, spine tall but not rigid, engages your abdominal muscles in a way that slouching against the chair back never will. This matters more on bass clarinet than on B♭ clarinet because the instrument needs more air and a faster airstream to speak clearly across its range, and breath support techniques for clarinet players depend directly on this open, upright torso position.
Foot placement matters more than most players assume. If one foot tucks under the chair while the other stretches forward, your torso twists slightly to compensate, and that twist shifts your right hand’s relationship to the lower joint keys. Over a two-hour rehearsal, that small misalignment turns into real finger fatigue, and it is the kind of postural drift that shows up in understanding bass clarinet discussions of technical facility.
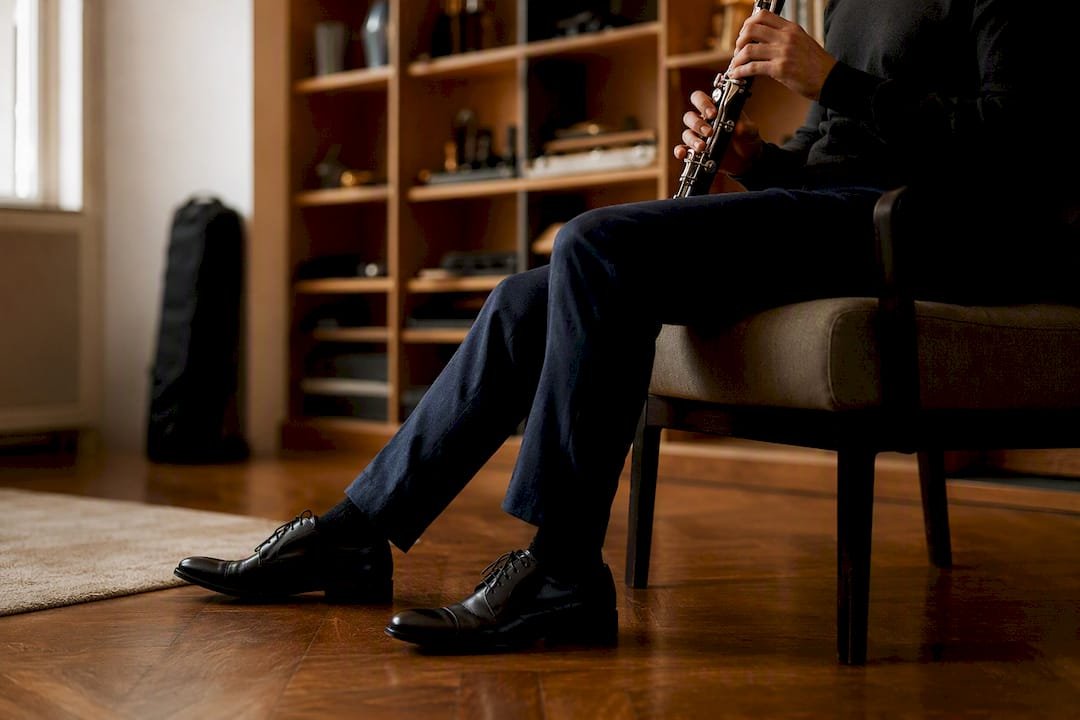
Mouthpiece angle deserves particular attention because it is where posture and setup collide. Aim for something close to your B♭ clarinet angle, around 45 degrees off vertical. Neck angle varies by instrument model, so some players compensate by sliding the bell slightly further back under the chair rather than dropping their chin to meet the mouthpiece, a fix detailed in guidance on bass clarinet ergonomics.
To put the setup sequence in order:
- Set your chair and feet first, before touching the peg.
- Adjust the floor peg so the instrument sits at the correct playing height without your help.
- Bring the mouthpiece to your embouchure by tilting the neck, not your head.
- Check that your shoulders are level and relaxed, not lifted toward your ears.
Pro Tip: If you catch yourself tilting your head down to “find” the mouthpiece, stop and lower the peg half an inch. The instrument should rise to meet you, never the other way around.
Setting Up the Floor Peg and Neck Strap Together
Bass clarinet pedagogy is consistent on one point: a peg alone or a strap alone rarely solves the support problem. Teachers recommend using both together, creating what’s often called three-point contact, where the peg carries the instrument’s weight, the strap gently pulls it into your mouth, and your embouchure completes the triangle, according to [Bass Clarinet 101](http://test.woodwind.org/clarinet/BBoard/download.html/1, 4639/Bass_Clarinet_101.pdf). That distributed support reduces the shoulder loading that otherwise degrades articulation speed and endurance over a long rehearsal.
Getting the peg height right takes a few seconds of trial and error, not a ruler. A few feel checks:
- If your shoulders creep upward while playing, the peg is too low.
- If you feel like you’re reaching down to meet the mouthpiece, the peg is too high.
- If the bell tips forward or backward on its own when you let go, the peg angle needs adjusting, not just the height.
A strap by itself tends to leave the neck absorbing weight the peg should carry, which is exactly the pattern that leads to soreness after long sectionals. Save the strap for fine control, positioning the mouthpiece precisely at your embouchure, and let the peg do the heavy lifting.
Pro Tip: Test your peg height while standing up, then sit down without moving the peg. If the mouthpiece angle changes dramatically between the two, you’ll need separate settings for sitting and standing, not one compromise setting.
If you’re shopping for peg and strap options, a clarinet accessory selection guide walks through which combinations suit different body types and playing situations.
Chair Height and Seating Adjustments That Stick
Small changes in seat height can change your arm-to-instrument geometry, which is why professional players often insist on the same chair for practice and performance rather than whatever happens to be available that day, a habit backed by findings on common repairs and setup issues. That consistency protects pinky reach on the lower joint keys, one of the first things to suffer when seat height shifts unexpectedly.
Shorter players or those using school-owned chairs that don’t adjust often need a simple booster. A firm cushion, a folded towel, or even a stack of books under the seat brings the hips level with the knees, which keeps the spine upright instead of forcing a hunch, a fix music educators recommend when seat height doesn’t match the player.
Run these three checks before any rehearsal or practice session:
- Hips level with or slightly higher than knees, never lower.
- Both feet flat on the floor, not dangling or tucked.
- Enough space between the chair edge and the back of your knees to avoid pinching circulation.
If your school or ensemble rotates chairs, keep a folding cushion in your case. It’s a five-dollar fix for a problem that otherwise costs you weeks of inconsistent hand position.
Breath Support: Why Bass Clarinet Demands More Air
The bass clarinet’s larger bore and longer air column mean it needs a bigger air supply and faster airstream than a B♭ clarinet to speak clearly, especially in the lower register. This is the single most misunderstood technical demand of the instrument, and it’s a direct extension of why posture matters so much: a hunched torso restricts the diaphragm right when the instrument needs it working hardest, a connection well documented in research on breath support for clarinetists.
Two exercises build the airstream speed and control the instrument demands:
- Long-tone control: play a low concert F for eight full counts, aiming for a tone that stays steady in volume and pitch from start to finish. Watch for your shoulders staying level and your stomach moving outward on the inhale, not your chest rising.
- Fast-airstream bursts: play short, accented notes in the clarion register, focusing on a quick, decisive puff of air rather than tonguing harder. If the note cracks or hesitates, the airstream is too slow, not the tonguing too weak.
The bass clarinet’s air demands aren’t a minor footnote. Players moving up from B♭ clarinet often report that the biggest adjustment isn’t fingerings or reading bass clef, it’s simply how much more air the instrument consumes per phrase, a pattern echoed across bass clarinet pedagogy resources like The Woodwind Method.
Assembly and Maintenance Checks Before You Blame Your Posture
Half of what feels like a posture problem is actually a mechanical one. The bass clarinet is far less forgiving of small leaks than a B♭ clarinet, and squeaks or weak articulation often trace back to pad seating rather than embouchure or seat height, according to common repair patterns.
Handle assembly with care to avoid creating the very problems you’re trying to diagnose:
- Never grip the instrument by a key or rod when joining the upper and lower sections. Hold the wood or body tube instead.
- Avoid depressing side keys while pushing the joints together, since this can bend a rod or misalign a bridge key without you noticing until later.
- Check the bridge mechanism between the upper and lower joints each time you assemble; a bent bridge key is one of the most common causes of notes that don’t respond cleanly.
- Watch specifically for leaks under the left-hand third finger pad, a known weak point on many bass clarinets, especially school instruments, as noted in assembly and mechanical guidance.
If a note consistently squeaks or refuses to speak regardless of how you adjust your posture, that’s a technician visit, not a seat height problem. A clarinet maintenance checklist can help you spot early warning signs before a small leak becomes a full repad.
Standing and Moving: Ergonomic Adjustments on the Fly
Marching band, standing chamber performances, and pit setups all demand a different support strategy than sitting. The floor peg that works perfectly in a chair often needs lengthening, or swapping for a shoulder-style strap, when you’re on your feet for an extended passage.
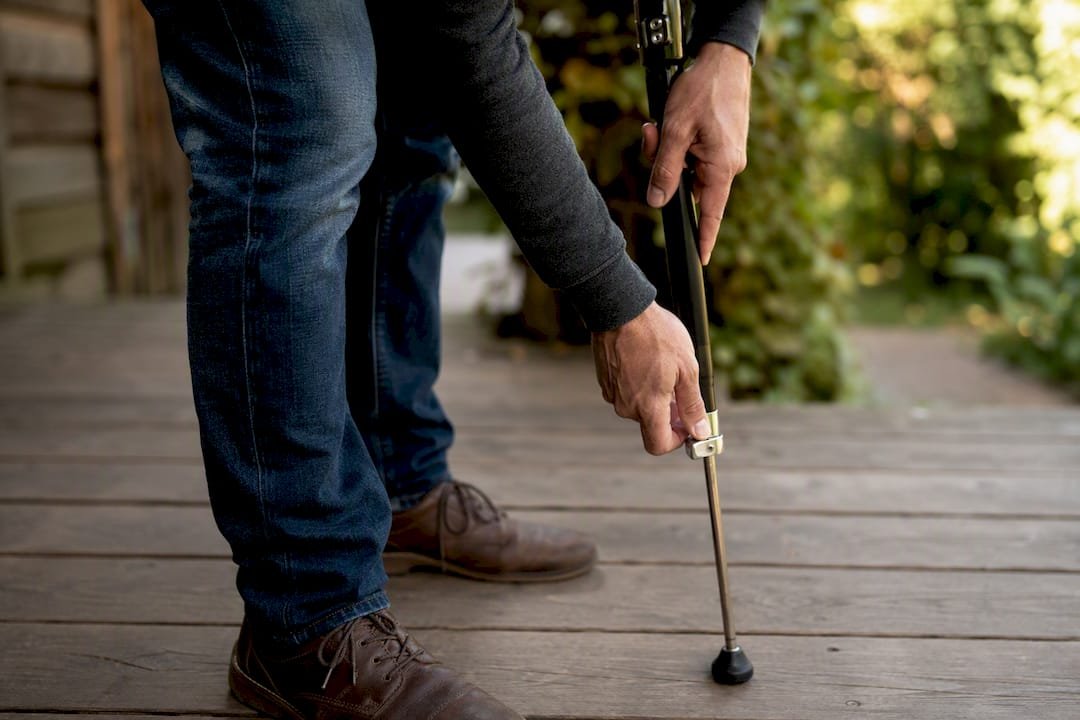
Check your peg length by standing in your typical playing stance and seeing whether the mouthpiece reaches your embouchure without any forward lean. If you’re leaning toward the instrument, lengthen the peg or switch to a strap rated for standing use.
Neck strain while standing almost always comes from a strap positioned too low, forcing you to tip your head down to compensate. Raise the strap attachment point until the mouthpiece meets you at a neutral head position, the same target angle you’d use sitting down.
A couple of quick exercises help during long standing passages:
- Shake out your hands and shoulders during rests longer than four measures, even briefly.
- Roll your shoulders back and down every few minutes to counter the forward creep that standing encourages.
Pro Tip: If you switch between sitting and standing setups often, mark your peg’s ideal standing length with a piece of tape. Guessing the setting each time wastes rehearsal time and invites bad habits.
Troubleshooting: Symptom, Likely Cause, Fix
When something suddenly feels wrong mid-rehearsal, work through cause and effect in order rather than guessing.
- Squeaks or a weak clarion register: check pads and assembly first. A leak under the left-hand third finger or a misaligned bridge key causes far more squeaks than embouchure ever does.
- Breath running out mid-phrase: this is almost always posture. Check that you’re sitting forward, not slumped, and run the long-tone exercise to rebuild airstream control.
- Missing the low pinky keys: check your seat height before anything else. A chair an inch too low or too high changes your reach to the lower joint keys more than most players expect.
- Sudden tone changes on a familiar instrument: stop and check the peg and strap tension. A peg that’s slipped or a strap that’s loosened mid-rehearsal shifts your mouthpiece angle without you noticing.
Before any rehearsal where something felt off last time, run this quick loop: check the peg height, check the bridge key alignment, check your seat height, and only then look at your own posture. If the fix isn’t obvious within a minute or two, a sound troubleshooting guide can help narrow down whether the issue is mechanical or postural.
A Practical Setup Worth Copying
Milos, drawing on years of watching students struggle with the same setup mistakes, keeps his own recommendations deliberately simple: one consistent chair whenever possible, a peg set so the instrument sits at his embouchure with zero neck tilt, and a light neck strap that takes just enough tension to steady the mouthpiece without pulling on his shoulders. His mouthpiece angle stays close to his B♭ clarinet setup, adjusted only enough to account for the bass clarinet’s neck geometry.
The habits worth building first, in order:
- Standardize your chair and peg setting before touching embouchure or reed adjustments.
- Run assembly checks every time, not just when something sounds wrong.
- Treat gear changes, a re-angled neck, a different strap style, as a later step, not a first response.
The single biggest fix for beginners isn’t a new accessory. It’s letting the peg do the work instead of your neck. Once players stop craning down to meet the mouthpiece, half their tone problems disappear before they even touch a reed.
Once posture and mechanics check out and you’re still fighting resistance or an unclear sound, a mouthpiece matching service can help identify whether the setup itself, not your technique, is working against you. Myclarinetstuff’s at-home Test Box program lets you compare several Gleichweit mouthpieces against your current setup before committing to a change, which matters because a mismatched facing or tip opening can mimic the same fatigue and resistance that bad posture causes.
What Actually Moves the Needle on Bass Clarinet Posture
Most posture advice out there treats setup as one-size-fits-all, a fixed peg height, a strap tension that supposedly works for everyone. It doesn’t. Body proportions, neck length, and even the specific bass clarinet model change what “correct” looks like, which is why the pedagogy that holds up best focuses on feel checks rather than fixed measurements.
The conventional advice also underweights mechanics. Plenty of players spend months adjusting their seat height or embouchure pressure to fix a squeak that a five-minute pad check would have solved. Rule out the instrument before you rule out yourself.
If you take one thing from this, prioritize breath support and mechanical checks before spending money on new gear. Posture fixes are free. A re-angled neck or a new mouthpiece only pays off once you’ve confirmed the problem isn’t sitting in your chair, your peg setting, or a bent bridge key.
— Milos